Difference between revisions of "WAV and soft-boiled eggs"
m (→Example) |
m (→Making-of) |
||
| (4 intermediate revisions by the same user not shown) | |||
| Line 7: | Line 7: | ||
<br>Sound quality is not great but that's from the original source, not due to our manipulations. |
<br>Sound quality is not great but that's from the original source, not due to our manipulations. |
||
| − | Let's display |
+ | Let's display its spectrogram and discover a first easter-egg: |
sox Tribute_rogers_stamos.wav -n spectrogram |
sox Tribute_rogers_stamos.wav -n spectrogram |
||
[[File:Tribute_rogers_stamos_spectrogram1.png|600px]] |
[[File:Tribute_rogers_stamos_spectrogram1.png|600px]] |
||
| Line 25: | Line 25: | ||
I made it mono, 44kHz, 16-bit signed and I normalized it: |
I made it mono, 44kHz, 16-bit signed and I normalized it: |
||
sox interview.wav -r 44100 -c 1 -e signed -b 16 interview16.wav norm |
sox interview.wav -r 44100 -c 1 -e signed -b 16 interview16.wav norm |
||
| − | + | Its spectrogram: |
|
<br>[[File:Tribute_rogers_stamos_spectrogram_orig.png|600px]] |
<br>[[File:Tribute_rogers_stamos_spectrogram_orig.png|600px]] |
||
| + | <br>Even if the video contained a 44kHz audio, we see that the original source was only 22kHz. It looks like we've plenty of room to draw but remember that whatever you put below 18-20kHz (depending on people and their age...) can be heard so we can only use the very high frequencies. |
||
<br><br>I prepared a simple banner in Gimp, with text in grey on black background. Grey means reduced audio signal, less chance for it to be audible. |
<br><br>I prepared a simple banner in Gimp, with text in grey on black background. Grey means reduced audio signal, less chance for it to be audible. |
||
<br><br>[[File:Tribute_rogers_stamos_you_cant.png]] |
<br><br>[[File:Tribute_rogers_stamos_you_cant.png]] |
||
| Line 37: | Line 38: | ||
AudioPaint always generates stereo files but we used only the left channel, so we need to isolate it: |
AudioPaint always generates stereo files but we used only the left channel, so we need to isolate it: |
||
sox Tribute_rogers_stamos_you_cant.wav -c 1 Tribute_rogers_stamos_you_cant1.wav remix 1 |
sox Tribute_rogers_stamos_you_cant.wav -c 1 Tribute_rogers_stamos_you_cant1.wav remix 1 |
||
| − | Here is |
+ | Here is its spectrogram: |
<br>[[File:Tribute_rogers_stamos_spectrogram_msg.png|600px]] |
<br>[[File:Tribute_rogers_stamos_spectrogram_msg.png|600px]] |
||
<br><br>Now we can merge the interview WAV with the high frequencies one and code it over 32 bits: |
<br><br>Now we can merge the interview WAV with the high frequencies one and code it over 32 bits: |
||
Latest revision as of 10:50, 4 March 2015
Intro
We've seen in BMP_PCM_polyglot that we can merge a BMP and a WAV in a single file.
Here we will merge two 16-bit WAV files in a single 32-bit file.
Depending how you interpret the endianness of the file you'll hear one or the other WAV, considering that with a maximal dynamic range of about 96dB (16-bit resolution), whatever below that level cannot be heard.
Example
Tribute_rogers_stamos.wav is such a WAV.
Sound quality is not great but that's from the original source, not due to our manipulations.
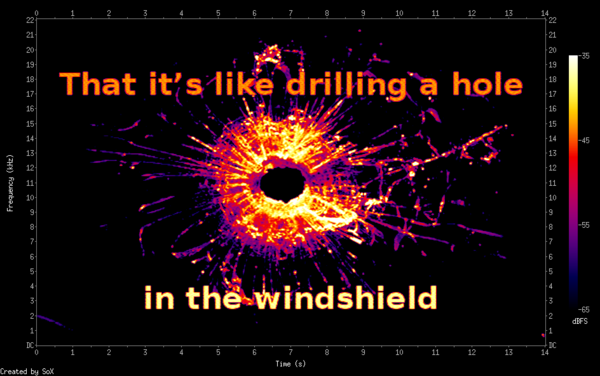
Let's display its spectrogram and discover a first easter-egg:
sox Tribute_rogers_stamos.wav -n spectrogram
Now if we change the endianness of the interpretation:
sox -t raw -r 44100 -c 1 -B -e signed -b 32 result.wav -n spectrogram -z 30 -Z -35
To do se you can see we've to interpret the WAV as a RAW file and provide manually its characteristics (44kHz, mono, 32-bit signed and, most important, big-endian).
The options -z and -Z are there to adjust the displayed dynamic range and get a more pleasant result.
Making-of
I used a short sequence featured in a TV news I found on Youtube about NSA Director Mike Rogers vs. Yahoo! on Encryption Back Doors:
youtube-dl "https://www.youtube.com/watch?v=s5GN1heBRLg"
I extracted the audio sequence starting at 1:50 and lasting 14 seconds:
mplayer -quiet Yahoo\,\ NSA\ battle\ over\ encryption\ access-s5GN1heBRLg.mp4 -ao pcm:fast:file=interview.wav -vc dummy -vo null -channels 2 -ss 1:50 -endpos 0:14
I made it mono, 44kHz, 16-bit signed and I normalized it:
sox interview.wav -r 44100 -c 1 -e signed -b 16 interview16.wav norm
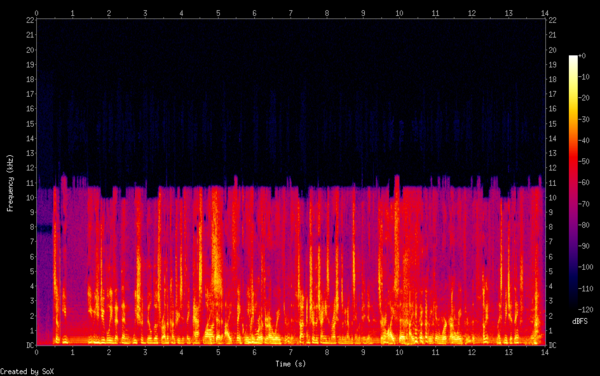
Its spectrogram:

Even if the video contained a 44kHz audio, we see that the original source was only 22kHz. It looks like we've plenty of room to draw but remember that whatever you put below 18-20kHz (depending on people and their age...) can be heard so we can only use the very high frequencies.
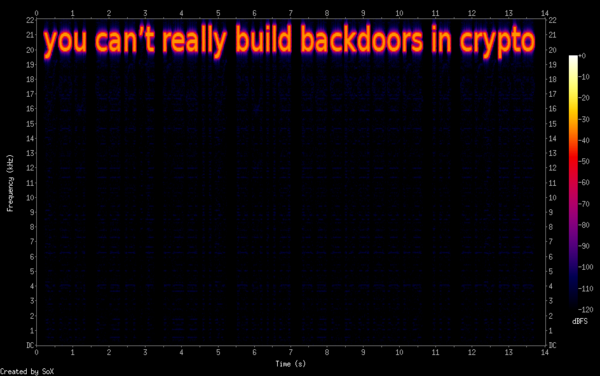
I prepared a simple banner in Gimp, with text in grey on black background. Grey means reduced audio signal, less chance for it to be audible.
![]()
I used again AudioPaint to convert it to a sound in the high frequencies, above most humans hearing range:
- open AudioPaint
- File/Import picture... Tribute_rogers_stamos_you_cant.png
- Audio/Audio settings... L/R=brightness/none minfreq=19000 maxfreq=22050 scale=linear duration=14
- Audio/Generate...
- File/Export Sound... Tribute_rogers_stamos_you_cant.wav
AudioPaint always generates stereo files but we used only the left channel, so we need to isolate it:
sox Tribute_rogers_stamos_you_cant.wav -c 1 Tribute_rogers_stamos_you_cant1.wav remix 1
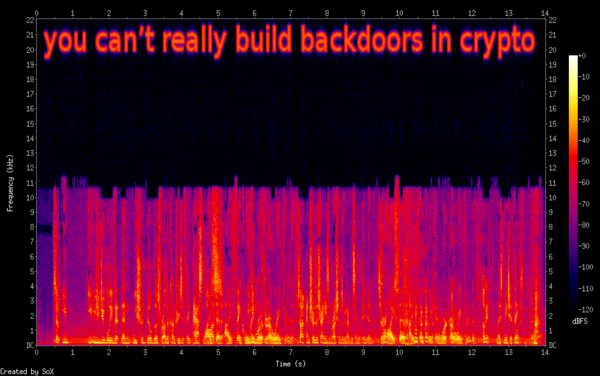
Here is its spectrogram:

Now we can merge the interview WAV with the high frequencies one and code it over 32 bits:
sox -m interview16.wav Tribute_rogers_stamos_you_cant1.wav -b 32 result1.wav
To hide the second spectrogram, choose a suitable image, convert it to a WAV of 14s with AudioPaint, now with no minfreq, and save the result as result2.wav.
Finally, we can merge the left channel of 16-bit stereo result2.wav into the 32-bit mono result1.wav with a few lines of Python:
#!/usr/bin/env python

from struct import unpack, pack

wav_in1 ='result1.wav'
wav_in2 ='result2.wav'
wav_out ='result.wav'

with open(wav_in1, 'rb') as wav1:
    w1=wav1.read()
header=w1[:w1.index('data')+8]
data=w1[w1.index('data')+8:]
with open(wav_in2, 'rb') as wav2:
    w2=wav2.read()
data2=w2[w2.index('data')+8:]
outdata=""
for i in range(len(data)/4):
    if i*4<len(data2):
        # Swap spectrogram to Big-Endian
        outdata+=data2[(i*4)+1:(i*4)+2]+data2[(i*4):(i*4)+1]
    else:
        outdata+='\x00\x00'
    outdata+=data[(i*4)+2:(i*4)+4]
with open(wav_out, 'wb') as wavout:
    wavout.write(header+outdata)
And voilà!

