Difference between revisions of "BMP PCM polyglot"
m (→Gimp) |
|||
| (2 intermediate revisions by the same user not shown) | |||
| Line 40: | Line 40: | ||
bmp_out='b.bmp' |
bmp_out='b.bmp' |
||
# BMP created with Gimp as 16-bit R5G6B5 |
# BMP created with Gimp as 16-bit R5G6B5 |
||
| − | f=open(bmp_in).read() |
+ | f=open(bmp_in, 'rb').read() |
# WAV created with mpg123 -w a.wav a.mp3 (stereo) |
# WAV created with mpg123 -w a.wav a.mp3 (stereo) |
||
w=wave.open(wav_in, 'rb') |
w=wave.open(wav_in, 'rb') |
||
</source> |
</source> |
||
| + | |||
==Parsing BMP== |
==Parsing BMP== |
||
{{#fileanchor: BMPPCM.py}} |
{{#fileanchor: BMPPCM.py}} |
||
| Line 174: | Line 175: | ||
<br>I can now use BMPPCM.py, slightly modified to read manually the sound samples as Python wave doesn't support three channels. |
<br>I can now use BMPPCM.py, slightly modified to read manually the sound samples as Python wave doesn't support three channels. |
||
<br>Result is here: http://wiki.yobi.be/images/d/d6/Pfrgb.bmp |
<br>Result is here: http://wiki.yobi.be/images/d/d6/Pfrgb.bmp |
||
| − | <br>Seen in baudline (as raw 44100Hz 3 channels 32-bit linear little-endian, channel mapping RGB and color aperture from -32 to -64dB, drift integrator beam width 126 slices) |
+ | <br>Seen in baudline (as raw 44100Hz 3 channels 32-bit linear little-endian, channel mapping RGB and color aperture from -32 to -64dB, 2048 square windowing, drift integrator beam width 126 slices) |
<br>[[File:Pfrgbspectrogram.png]] |
<br>[[File:Pfrgbspectrogram.png]] |
||
| + | =Sound in sound= |
||
| + | See [[WAV and soft-boiled eggs]] |
||
=Troubleshooting= |
=Troubleshooting= |
||
Latest revision as of 01:24, 4 March 2015
BMP & PCM
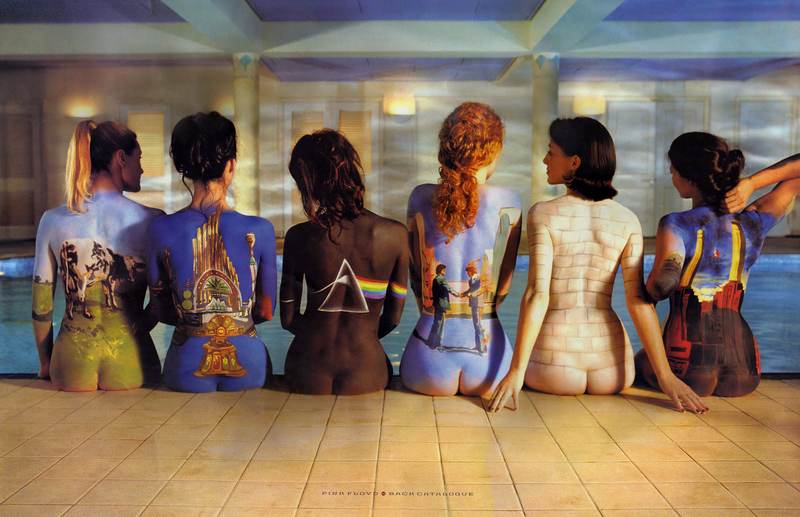
This is a Poc (Proof of Concept) to create a file that can be seen as image (BMP) and played as sound (RAW PCM).
So it's a kind of polyglot file.
It's a bit comparable to steganography but here the sound doesn't need to be extracted first, the file can be just played as such, provided that you tell to the player what are the sound specs (sampling rate, channels, bit-depth).
The trick is the following:
We start from a 16-bit BMP and 16-bit WAV and merge samples to create a 32-bit BMP/PCM.
16-bit BMP can be created e.g. with The Gimp, choosing 16-bit R5G6B5 encoding.
16-bit WAV can be mono or stereo, of arbitrary sampling rate, non compressed, little endian.
Initial RGBA masks are for R5G6B5: 0000F800, 000007E0, 0000001F, 00000000
When grouping pixels and sound samples together we'll extend the sound from 16-bit little endian to 32-bit little endian so we add low 16-bits, under audible level, and we'll put the pixels there.
So we adapt the BMP masks to tell where the color components are now.
To conclude: image will be below audible level and sound will be ignored by BMP masks.
Example:

Click on the image to download the combined BMP.
Sound can be played e.g. with
wget -O - http://wiki.yobi.be/images/9/9c/Pf.bmp|aplay -r 44100 -c2 -f S32_LE
Or with Audacity: import as raw and specify sampling rate=44100, stereo, 32-bit little endian
[{{#filelink: BMPPCM.py}} BMPPCM.py is available for download here]
Beginning
{{#fileanchor: BMPPCM.py}}
#!/usr/bin/env python

from struct import unpack, pack
import wave

PCM_LE = True  # PCM 32-bit should be Little Endian or Big Endian?
bmp_in ='a.bmp'
wav_in ='a.wav'
bmp_out='b.bmp'
# BMP created with Gimp as 16-bit R5G6B5
f=open(bmp_in, 'rb').read()
# WAV created with mpg123 -w a.wav a.mp3 (stereo)
w=wave.open(wav_in, 'rb')
Parsing BMP
{{#fileanchor: BMPPCM.py}}
class bmp(): pass
class bmpheader(): pass
class bmpdib(): pass
b=bmp()
b.header=bmpheader()
b.dib=bmpdib()

fheader            =f[0:14]
b.header.magic     =fheader[0:2]
assert b.header.magic == "BM"
b.header.filesize, =unpack('<I', fheader[2:6])
b.header.unused1,  =unpack('<H', fheader[6:8])
b.header.unused2,  =unpack('<H', fheader[8:10])
b.header.offdata,  =unpack('<I', fheader[10:14])
fdib               =f[14:b.header.offdata]
fimg               =f[b.header.offdata:]
b.dib.dibsize,     =unpack('<I', fdib[0:4])
assert b.dib.dibsize == len(fdib)
assert b.dib.dibsize >= 56 # at least BITMAPV3HEADER
b.dib.width,       =unpack('<i', fdib[4:8])
b.dib.height,      =unpack('<i', fdib[8:12])
b.dib.planes,      =unpack('<H', fdib[12:14])
b.dib.bpp,         =unpack('<H', fdib[14:16])
assert b.dib.bpp == 16
b.dib.comp,        =unpack('<I', fdib[16:20])
assert b.dib.comp == 3 # BI_BITFIELDS
b.dib.imgsize,     =unpack('<I', fdib[20:24])
assert b.dib.imgsize == b.header.filesize - b.header.offdata
b.dib.hppm,        =unpack('<I', fdib[24:28])
b.dib.vppm,        =unpack('<I', fdib[28:32])
b.dib.colors,      =unpack('<I', fdib[32:36])
b.dib.icolors,     =unpack('<I', fdib[36:40])
b.dib.Rmask,       =unpack('<I', fdib[40:44])
b.dib.Gmask,       =unpack('<I', fdib[44:48])
b.dib.Bmask,       =unpack('<I', fdib[48:52])
b.dib.Amask,       =unpack('<I', fdib[52:56])
b.dib.remaining    =fdib[56:]
b.img              =list(unpack('<'+'H'*(b.dib.imgsize*8/b.dib.bpp), fimg))
Making BMP 32-bit
And shifting filter masks if needed {{#fileanchor: BMPPCM.py}}
b.dib.bpp=32
if PCM_LE:
    b.dib.Rmask <<=16
    b.dib.Gmask <<=16
    b.dib.Bmask <<=16
    b.dib.Amask <<=16
Reading enough sound samples
{{#fileanchor: BMPPCM.py}}
assert w.getnchannels() <= 2     # 1 or 2 channels
assert w.getsampwidth() == 2     # 16-bit
assert w.getcomptype()  == 'NONE'
assert w.getnframes() * w.getnchannels() >= len(b.img)
s=list(unpack('<'+'h'*len(b.img), w.readframes(len(b.img) / w.getnchannels())))
Recreating samples
from pixels & sound samples {{#fileanchor: BMPPCM.py}}
if PCM_LE:
    for i in xrange(len(b.img)):
        b.img[i], = unpack('<I', pack('<hH', s[i], b.img[i]))
else:
    for i in xrange(len(b.img)):
        b.img[i], = unpack('<I', pack('<H', b.img[i]) + pack('>h', s[i]))
Fixing BMP headers
with new size {{#fileanchor: BMPPCM.py}}
b.dib.imgsize = len(b.img) * b.dib.bpp / 8
b.header.filesize = b.dib.imgsize + b.header.offdata
Packing back BMP
{{#fileanchor: BMPPCM.py}}
b2=b.header.magic+pack('<IHHIIiiHHIIIIIIIIII', b.header.filesize, b.header.unused1, b.header.unused2, b.header.offdata,
b.dib.dibsize, b.dib.width, b.dib.height, b.dib.planes, b.dib.bpp, b.dib.comp, b.dib.imgsize,
b.dib.hppm, b.dib.vppm, b.dib.colors, b.dib.icolors, b.dib.Rmask, b.dib.Gmask, b.dib.Bmask, b.dib.Amask)
b2+=b.dib.remaining
p={8:'B', 16:'H', 32:'I'}[b.dib.bpp]
b2+=pack('<'+p*(b.dib.imgsize*8/b.dib.bpp), *b.img)
open(bmp_out, 'wb').write(b2)
print '%s written!' % bmp_out
print 'You can play it as signed 32-bit PCM, e.g.:'
print 'cat %s | aplay -r %i -c %i -f S32_%s' % (bmp_out, w.getframerate(), w.getnchannels(), ("BE", "LE")[PCM_LE])
[{{#filelink: BMPPCM.py}} BMPPCM.py is available for download here]
Image in sound
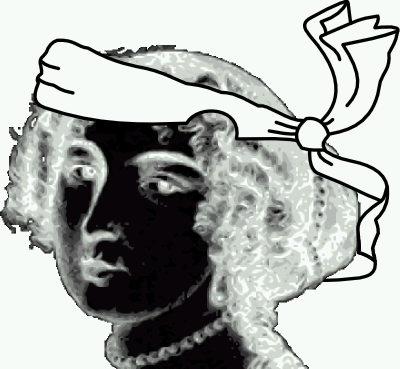
@angealbertini proposes to hide an image in an audio spectrum so both techniques can be combined.
AudioPaint allows to make easily such sounds. But we've to be a bit careful to have a sound file of the right size if we want to put it in the BMP file.
E.g. choose channel routing: L=brightness / R=none, linear scale, 22050Hz (sampling rate / 2) and choose a duration such that the samples of the left channel will be equal or slightly larger than the number of pixels:
duration = image width * height / sampling rate
Then once WAV is saved, we isolate the left channel
sox audiopaint.wav -c 1 a.wav remix 1
So we have a proper sound file to be combined with the BMP.
Example with

Click on the image to download the combined BMP.
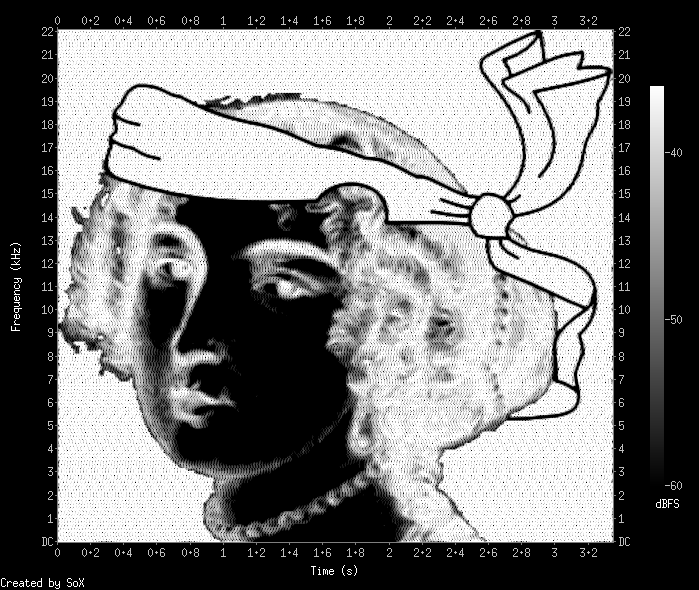
To see the spectrogram:
sox -t raw -r 44100 -c 1 -e signed -b 32 Corkami.bmp -n spectrogram -m -x 555 -y 512 -z 24 -Z -36

Size 555x512 is the initial image size 400x369 scaled up such that y is a power of 2 (for FFT)
Note that sampling rates are not really important as the absolute time and frequency scaling doesn't mean anything here.
Image in sound: add color
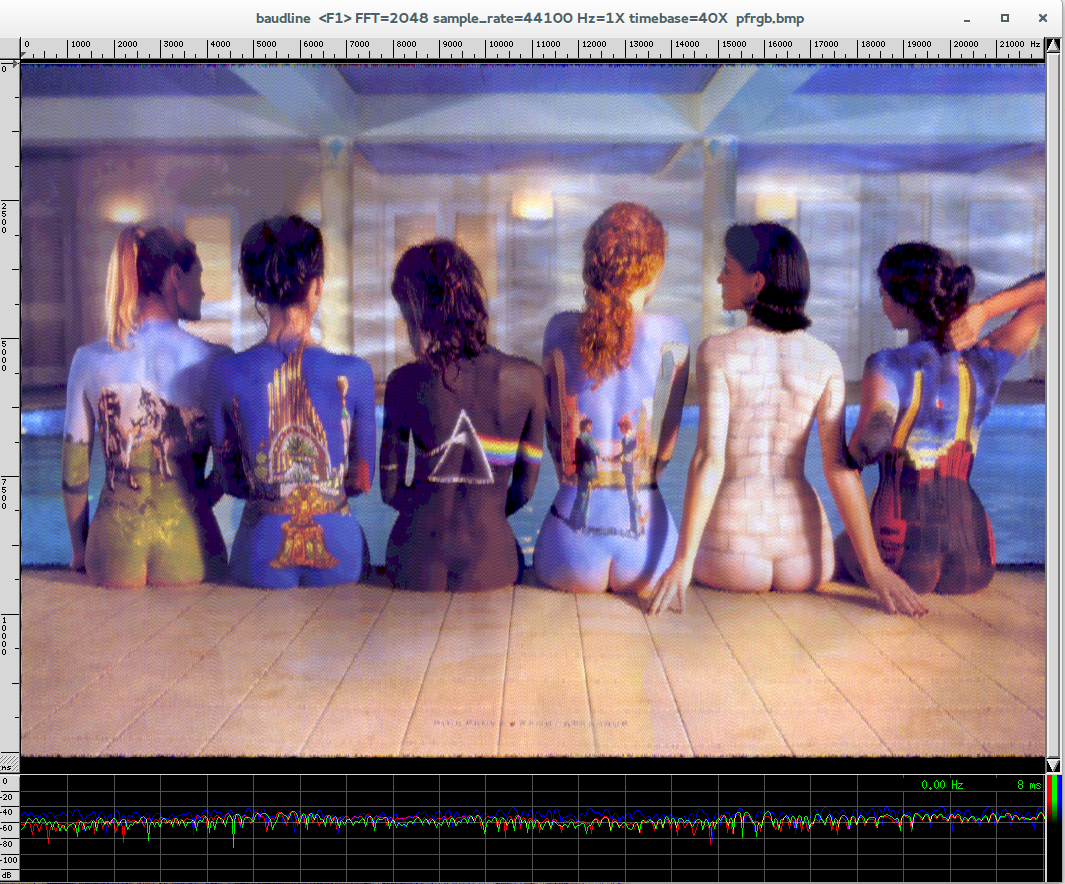
Here is another PoC based on the same picture as in our first test, but now the spectrogram of the picture will be the picture itself, in colors!
It's a bit tricky because AudioPaint and Python wave module only support stereo and I want 3 channels, to encode RGB of course, and sox displays three spectrograms instead of one combined.
To display the spectrogram, I'll use baudline.
Because baudline works in waterfall mode (time is on vertical axis, going downwards) we'll rotate first the image anti-clockwisely.
Then in AudioPaint I choose a duration such that total of the three channels will be slightly larger than the amount of pixels:
1600*1034/44100/3 <~ 12.51 seconds
I make two WAV with AudioPaint, a first one with L=red R=green, saved as rg.wav, and a second one with L=blue R=none, saved as b.wav
Then I recombine the three channels with sox
sox -M rg.wav b.wav -c3 a.wav remix 3 2 1
I can now use BMPPCM.py, slightly modified to read manually the sound samples as Python wave doesn't support three channels.
Result is here: http://wiki.yobi.be/images/d/d6/Pfrgb.bmp
Seen in baudline (as raw 44100Hz 3 channels 32-bit linear little-endian, channel mapping RGB and color aperture from -32 to -64dB, 2048 square windowing, drift integrator beam width 126 slices)

Sound in sound
Troubleshooting
Gimp
It seems Gimp >= 2.8.8 has a bug when opening our crafted BMP (dark greenish image) while Gimp <= 2.8.6 is ok.
See my bugreport & patch, now integrated for next release.
Saturated sound?
If the sound is saturated, you probably imported the PCM as 32-bit float or big endian or 16-bit instead of 32-bit signed little endian.
(unless you're trying to play the files with image in spectrogram, there is nothing to listen to there, only in the very first image)
Thanks @cbrocas ;-)
Misc
If you want to know more about the bodypainting picture used, see http://www.feelnumb.com/2012/07/19/the-classic-1997-pink-floyd-back-catalogue-poster/